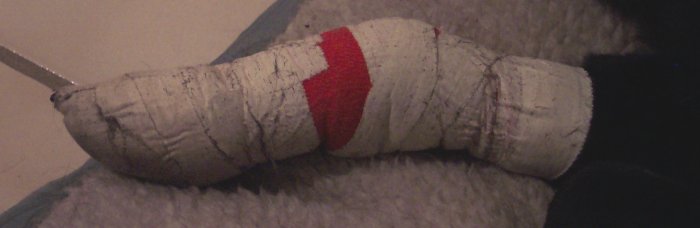
(Figure 1: The problem)
Recently my dog, Riley, had to have a cyst removed and as a result, he's had to wear a bandage on his leg for the past few weeks. The bandage is supposed to be kept dry, which is no small feat during a Wisconsin winter. This December's been particularly troublesome, and it took me awhile to figure out the best way to keep it dry. Here's hoping that this makes it into Google's search results and can help somebody else out.
A brief summary:
- A decent and cheap (free, probably) method is a combination of an IV bag and duct tape, with regular maintenance on the duct tape.
- You'll get better results with a commercial bandage protector, though. You may have to reinforce it with more duct tape, and add in some extra waterproofing (ie: a plastic bag), but this would give you the best results.
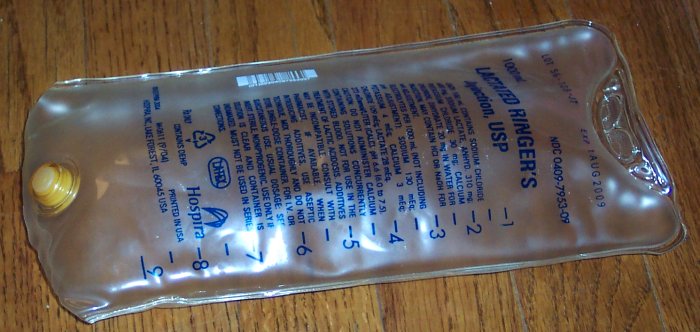
Method One: an IV Bag
Cost: Free (your vet should be able to provide you with one of these)
When we picked Riley up from the vet, he gave us one of these and said that it was a good way to keep the bandage dry. As you can see, it's just a regular IV bag with the top cut open. You just slip it over the bandage, put a rubber band or two at the top, and head on your way. The little knob at the top is handy for making sure that the rubber band stays about where you want it to. This actually DOES work pretty well, but it's problematic for a few reasons:
So, it did do a pretty good job, despite all that, but it was definitely a pain. Most of the time I'd have to spend some time with a hair dryer after the walk, making sure that the wetness which made it through the defenses got dried off properly.
- The plastic has absolutely no traction at all on ice, which was plentiful at the time.
- Despite the heavy-duty plastic, it only takes a couple of walks before holes start to form and water/snow start getting in.
- Because the snow, at the time, was up over Riley's armpits in most places, and because he's too pigheaded to Go anywhere but in the middle of snow drifts, snow would inevitably get scooped along and require drying out, anyway.
- When the plastic gets cold, it stiffens up, which ends up (at least in Riley's case) pressing against the wound whenever he takes a step, so after awhile he ends up limping along somewhat pathetically.
Method One-And-A-Half: add some duct tape
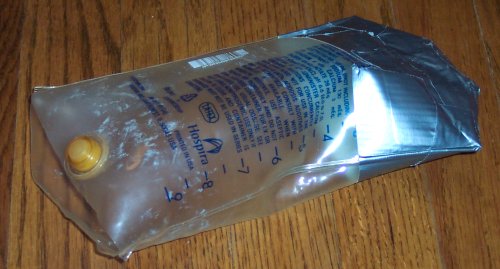
The best solution (that I came up with) for the problem of holes-in-the-bag was, of course, duct tape, though that actually wasn't the first thing I tried. The nice thing about duct tape is that it holds up pretty well when it gets wet, as opposed to some of the other things that I had tried.
What I recommend doing is having a base layer of duct tape that you apply before any holes develop, ideally before it's even been used the first time. Then put a second layer on top of that, also right away. After every walk, if your dog is anything like mine, the top layer (and possibly the second) will require some attention. Don't just keep on adding new layers forever, though - it'll be okay for three or four layers, but the more you add, the less flexible the bag will become, and it'll end up scooting down, and eventually your dog will end up with this ridiculous floppy "foot" which doesn't help anyone. With just one or two layers, the bag still bends pretty well, but too much more than that and it becomes more trouble than it's worth.
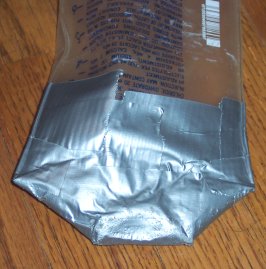
So, once holes start to develop, remove the top layer or two, and then patch it up. I'd recommend leaving the bottom layer on if possible, since removing it can stress the bag a bit much. You can get duct tape in various colors, it may be a good idea to use a different color for the base layer, so it's easy to tell. All I had was the usual silver, though, so I just used that. Regardless, I found that I needed to do at least a bit of maintenance after each walk, to keep it happy.
This doesn't address the other non-hole-related problems, unfortunately. I never did find a good solution for traction - duct tape wasn't really much better than the rubber. I think that a pretty good solution would be to get some sticky velcro and create a big patch of it where the base of the foot will be, and then put together a little "patch" which can be applied to the bottom of the foot, with some kind of coarse fabric which would provide some traction (like the sort used in dog booties). That may also have the benefit of keeping the bag itself out of harm's way - instead of the duct tape or bag taking the abuse, this layer of removable Stuff would be taking the abuse. I never actually took the time to try that out, though.
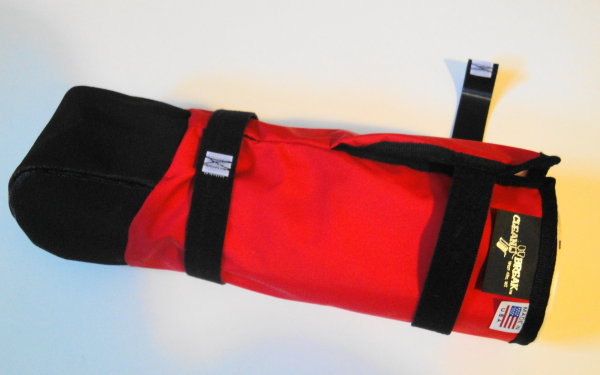
Method Two: spend some money
Cost: Mine was a little over $20 with shipping (but prices could vary)
(The CLEAN/BREAK protector)I got quite annoyed with the IV bag one night and did some searching on the internet, and discovered the CLEAN/BREAK protector. You can read plenty about it over on the site, but in summary, I found it to be a very good product. Because it doesn't bow out at the end (where the rubber band is) like the IV bag did, I found that I had far fewer problems with having snow scooped into the bandage, and Riley found it very comfortable.
I ended up reinforcing the bottom with more duct tape, which I tended to do maintenance on after every walk. The material wasn't absolutely 100% waterproof against the extreme weather I was experiencing, but it did a remarkably good job. The version that I used was purchased in December 2007, and apparently the protector has undergone some improvements since then, so it's possible that the duct taping wouldn't be necessary anymore, etc. I'd definitely recommend it in any case, though. The persistent December snow eventually turned to rain, and there were a few walks where I was convinced that I was going to get back inside to discover that the foot of his bandage was soaked, but it would turn out to be basically just fine.
The version that I had gotten (in 2007) did have its limits - once the sidewalks had basically turned into gigantic puddles, the protector couldn't quite keep up with what was essentially taking walks through lakes. It was still very impressive, though, and for all the hassle it's saved me from dealing with the IV bags, it was well worth the price I paid for it. Riley definitely likes it far better than the IV bag, as well, just from a comfort issue, and that's worth a lot as well. It was frustrating seeing him limping along in the IV bag, whereas he trots all around like he's having a great time when he's got this on.
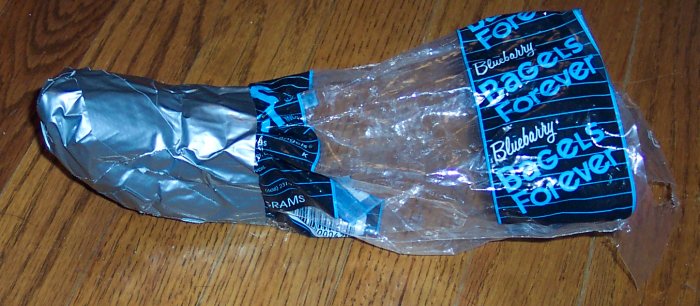
Method Two-And-A-Half: add in some extra waterproofing
(ART!)The need to be completely waterproof, even in the face of effectively total immersion did need to be addressed, though. We had some pretty constant rain for some time which basically turned our neighborhood into a lake, which was overwhelming even the protector.
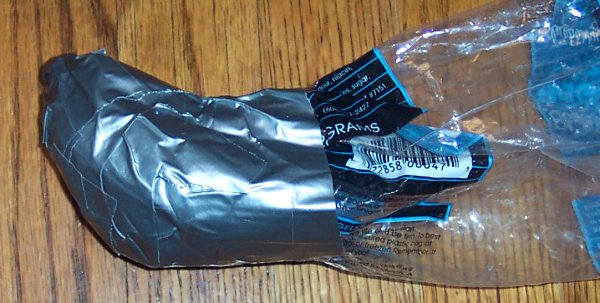
So, as you can see, I just took a bagel bag (any bag would do) and put it around his bandage, and then loosely duct-taped together the end so that it formed as nice snug fit around the foot of his bandage. You'll definitely want to make sure that the foot can still go in and out easily. Once I had all that together, I'd put on this bag first, and then the CLEAN/BREAK protector on top of that, and we'd be good to go. Even when the water outside overwhelmed the protector, the bag was there to stop it.
Keep in mind that if the edge of the bag overshoots the protector at all, you may encounter the snow-scooping problem again, so be on the lookout for that. I've found a rubber band at the end of the bag works quite well (much better than the rubber band used on the IV bag, since this much thinner plastic can form a tighter bond around the leg). Otherwise, just trim down the bag so that it's entirely contained within the protector, and you shouldn't have to worry about it.
Conclusion
In the end, I think the secret is this:So that's what I've come up with, and it works well for me. Let me know if you've tried something else that works as well, and I'll add it in here.The nice thing about doing it that way is that the inside layer which does the waterproofing doesn't have to be thick or cumbersome or stiff. If you have the outside protective layer which is keeping the pavement at bay, the inside layer can afford to be a little flimsy, but that works in your favor because the dog's much more comfortable, and a simple bag is really all you need waterproofing-wise, anyway. I've still got to do duct-tape maintenance on the foot of the protector after most walks, but since using this combination I haven't had any problems with his bandage getting wet.
- Two layers
- The outer layer should be primarily concerned with protection (ie: making sure that it's sturdy enough to not develop holes)
- The inner layer should be primarily concerned with waterproofing.
It certainly helps that my outer layer is fairly waterproof to begin with, and it's also nice that the inner layer could probably take a fair amount of wear itself, too.