Character Editor Usage
Usage of the character editor should be mostly self-explanatory, so I won't go into much detail. Note that the editor can load in graphics from the main Eschalon program folder. Specifically it will provide graphic lookups for your Avatar, and for items. If you're not seeing images, edit the program's preferences so that it knows how to find your Eschalon program folder.
Note that when looking at the Item tabs, you can click on the item button itself to edit the item, or construct your own item from scratch. You're not limited to the cut/copy/paste/delete buttons available to the right of the main button.
The character editor actually includes a few command-line options as well, if you didn't want to have to deal with running a GUI. I'm open to suggestions for new commands to add, if you think that something else would be useful. The current most useful commands can be shown like so:
$ eschalon_b1_char.py --help
...
To manipulate character data from the console:
        eschalon_b1_char.py [--set-gold=<num>] [--rm-disease]
                [--set-mana-max=<num>] [--set-mana-cur=<num>]
                [--set-hp-max=<num>] [--set-hp-cur=<num>] <charfile>
The full --help output will be more descriptive, and also includes some flags for simply displaying information about the character. Just using the commandline version should also let you get away with only having to install Python on your system - the CLI doesn't use GTK/Cairo/PyGTK, etc.
Map Editor Usage
The map editor should be pretty straightforward, though I've made some notes on mapping which you should probably look over if you want to start making changes to maps.
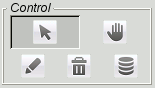
Controls
There are five icons under the "Control" section which determine what your mouse buttons do. From left to right:
Edit (arrow)
This will edit individual squares one-by-one. Simply click on a tile on the map, and a dialog will open which will let you modify all attributes on the square. This method gives you the most amount of control but is quite slow for doing anything other than small, localized edits. When not in "edit" mode, you can still edit an individual square by using the right mouse button.Move (hand)
In this mode, click-and-drag to move the map around, without having to fiddle with scrollbars. When the "move" tool isn't selected, you can still click-and-drag by using the middle mouse button.Draw (pencil)
This is the most efficient mode of editing, which will let you alter large areas of the map easily and quicky (in theory, anyway). More on this later.Erase (trash can)
This is the counterpart to Draw mode, in which you can easily remove things from the map.Objects (database/circles)
This will let you place premade objects down, like doors, chests, powder kegs, enemies, NPCs, and more.At any time while editing you can press e, m d, r, or o to immediately activate any of those modes.
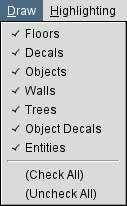
Draw Menu
The "Draw" menu lets you specify what graphics to show. Internally there are acutally only five kinds of map graphics: Floors, Floor Decals, Objects, Object Decals, and Entities. Floors are the base tiles, of course. Floor Decals are things like dead bodies, scortch marks, and "blending" graphics from one floor type to another. Objects can be a wide range of things, from walls and trees to wells, bookcases, tents, statues, etc. Object Decals are things like windows, banners, crack marks, and other embellishments to the basic Object graphic. Entities are monsters and NPCs.
For convenience's sake, I've split out the graphics filters so that Walls and Trees are separate from the rest of the Objects. I've found that to be a useful distinction to have. Internally to Eschalon itself, Objects are stored in four "sets," the first two of which are a mix, the third of which is all walls, and the fourth are the five most common trees. That's the distinction I make on those filters, though astute observers will note that there are some tree graphics stored in the first two "sets" of objects, which don't get filtered out properly. Especially when you're browsing off in Crakamir, the "Trees" filter doesn't really do a whole lot. That'll get fixed eventually.
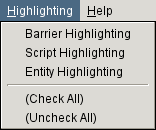
Highlight Menu
The "highlighting" filters should be pretty self-explanatory. The "Barriers" filter will highlight unpassable tiles with white, a purplish-white for tiles which are unpassable but can be "seen" through by the player and entities, and (in Book 2 only) a deeper blue for walls which are unpassable and also restrict player movement around them.
All three types of barrier highlightingThe "objects" filter will highlight most objects with yellow, sound and light generators with cyan (again, see the Map/Script Information section), and "broken" objects (with no object type specified) in red.
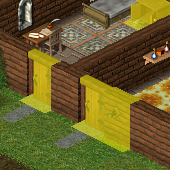
Regular scripts, on the left, and a sound generator tile, on the rightThe "entities" filter will highlight unfriendly entities in red, and friendly entities in green.
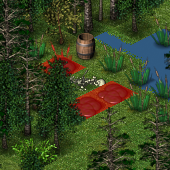
Some Fungal Slimes, on the Left, and Abygale, on the rightDrawing
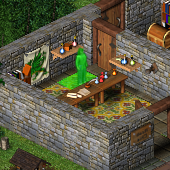
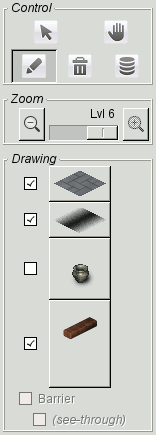
When the Draw tool is selected, you have the option to select exactly what you'll draw. In the example above, for instance, drawing on the map would produce stone walls, and not affect the floor graphics, or any decals.
One feature of note is the "barrier" checkbox which isn't active on that screenshot. If you turn on Barrier Highlighting (via the Highlight menu) you'll have the option to use this feature, which will let you explicitly paint areas where the player isn't allowed to walk in-game, rather than just letting the map editor try to handle that for itself.
As you might have guessed from the checkboxes, you can elect to draw multiple tile elements at the same time. For example, you might end up wanting to do something like this:
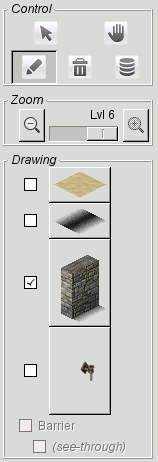
Erasing
Like the Draw tool, the Erase tool will let you choose which elements you want to erase. For example, in the graphic above, you'd be only removing Wall elements, leaving decals and floor graphics in-place. Also like with the Draw tool, if you have Barrier Highlighting turned on, you can use the Erase tool to clear the "barrier" field from the map, which would let you easily define areas where the player is allowed to walk. The "Entities" and "Objects" buttons will be available only if you have Entity or Object highlighting on.
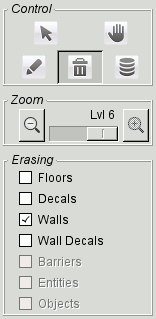
Placing Objects
This tool lets you put down a number of pre-made objects on the map, which will usually include one or more graphical elements and an associated object. This can be handy to create containers, doors, monsters, and other common items without having to fiddle with all the possible values. You may have to go in and edit the defaults to suit, of course, but hopefully this should save work. The slashes in the item descriptions shown relate to the "direction" of the object. For example, the "Sconce /" would fit on a wall which runs from the southwest to northeast.
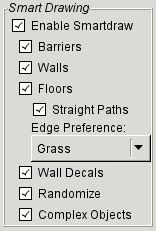
Smart Drawing
Smart Drawing is a big part of the 0.5.0 release, and aims to simplify the editing of maps. If you're doing very precise work in an area of the map, it may be useful to turn off smart drawing altogether, but in general I hope that it's a useful feature.
Randomize
This option will automatically randomize the drawing of various elements where appropriate. There are, for example, four different grass tiles available. If you just draw one of those over a large area, it doesn't look very good, whereas if you randomize the selection of grass tiles, it looks much more natural. This option will enable randomization for: a couple of reddish ground tiles, grass tiles, stone, cobbles, a collection of "dry" grass, some shrubs, trees, and rocks, and (assuming that the "Wall Decals" checkbox is enabled) some wall shadows and cracks.Complex Objects
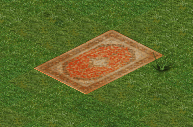
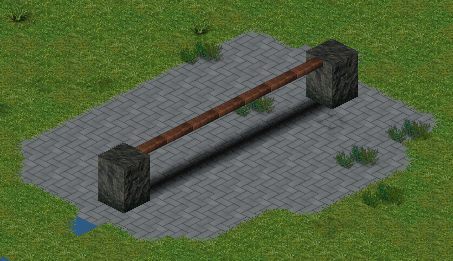
There are a few elements in the game which require more than one tile to fully draw (for example, carts and tents). With this option enabled, the editor will automatically fill in all related graphics in the appropriate spot. The following carpet image was produced with a single mouse click:
Barriers
With this option enabled, smartdraw will attempt to fill in the "barrier" field as it goes.Walls
This option is mostly used to intelligently link walls and fences together, so that you don't have to choose every corner tile, etc. You should be able to just naturally draw walls. Note that there are certainly areas in-game which could not have been produced with this option active; for instance, the wall surrounding Blackwater can't be done with this option.Floors
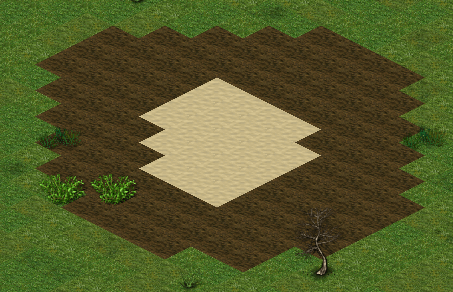
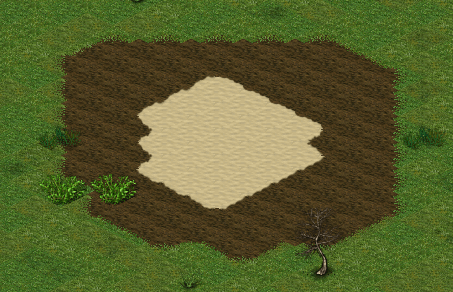
This is the most complex part of the smartdraw feature, and the most likely to end up having bugs - be sure to let me know if it's doing something obviously wrong. Basically this was implemented because in order to have smooth blending between various floor types (most often out in the wilderness where there are paths), you must have a layer of Decals on top of the actual Floor graphics, otherwise it will look very blocky and unnatural.
Without Smart Floors
With Smart FloorsGetting the decals right by hand is highly annoying and time-consuming, but note that due to the nature of the option, it will alter decal images on surrounding tiles as well as on the specific tile you're editing, which can occasionally produce results you don't want. If you need greater control over a specific area of the map, you may need to disable this option.
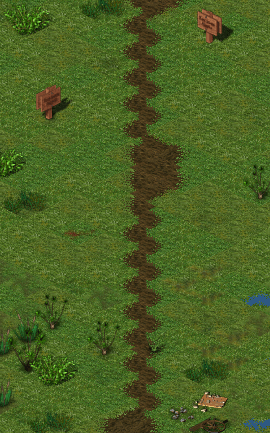
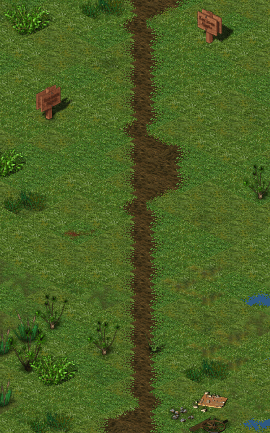
Straight Paths
I discovered this option purely by accident when working on the ordinary smartdraw routines. With the option enabled, paths that you draw through grass will be drawn as straight as possible, rather than with a zigzag pattern. The base Eschalon maps are actually typically in a zig-zag pattern, so if you want to stay consistent with the look of the original game, you may want to turn this option off.
Without Straight Paths
With Straight PathsEdge Preference
When using the Smart Floors feature, there are a few sets of floor decals available: grass, sand, beach, and (in Book 2 only) snow and lava. I was unable to come up with a good way to have smartdraw automatically determine which one should be used, so in the end I left it as a choice for the user to make. Note that if you have a smallish area which requires multiple kinds of edges, you'll likely have to end up editing some of it by hand, without the aid of the smartdraw feature.Wall Decals
This option actually doesn't do anything without the Randomize checkbox enabled as well. It will randomize wall cracks and smudges (of which there are just two possible tiles per group).